
This tutorial was written on 12-7-21, By Kelli.
Please don't copy it or claim it as your own or post it through any
group. You may link back to my blog.
Any resemblance to any other tutorial is strictly coincidental.
It is written assuming you have a basic knowledge
of PSP and its tools.
It is written using PSP 9 but should work in any other version.
For this tutorial you you will need
a tube of choice,
I used a bonus tube from
You can find these tubes here
I used the matching kit
Here
Choose your favorite font
The font I used is
2Peas Well Behaved
You will need a mask of choice.
The one I used was created
by Kathyfrances.
You can find it here, at the Escape from Reality blog
I used Mask #25
Ready?
Open a new image, 700X 700.
Paste Sparkles (4) as a new image,
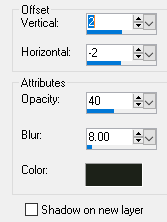
Add a drop shadow, here are my settings
Resize the element X 70%
Then add the same drop shadow,
but change the H&V to -2 ,and 2.
Resize it again and add the same drop shadow.
Or one of choice.
Add your tube, resize it as needed to fit inside the bubble.
I resized mine X 70% twice.
Sharpen the tube
Then ad the same drop shadow.
Move the tube so it fits inside the bubble.
Then merge down.
Move to center bottom of canvas,
Make sure not to cut off any of the shadow.
Paste Element #2 (The bunny)
Resize it by 70% and add the drop shadow.
Make him sit on the bubble.
Add element #5, The snow balls.
Drag it below the bunny.
Resize it by 70% Twice. Add the same drop shadow.
Position it as desired and merge visible.
Now add your elements of choice.
I used these:
Leaves 2 - Resize by 85% Drag it to the bottom,
Position at the bottom of the bubble.
Leaves 1 - Resize by 85% twice.
Add your drop shadow. Position it on top of leaves 2.
And to one side. Duplicate, Resize it by 85%. Mirror it Position it and add the shadow again. if desired.
Add Leaves (3). Resize it by 70% twice.
Position it to the bottom right side.
Add the shadow,
Repeat with Leaves (4)
Rotate by 40%. Position it to the left side.
Add a new layer, Select all.
Paste a paper of choice into selection.
I used paper # 6.
Select none. Add your mask
and merge group.
Resize it by 90%.
Add a new layer and drag it to the bottom.
Fill it with White.
Add a drop shadow to the mask layer.
Add appropriate Copy wright.
Add your name and position it.
Add this inner bevel :

No comments:
Post a Comment