Tuesday, December 7, 2021

Winter Wonderland

This tutorial was written on 12-7-21, By Kelli.

Please don't copy it or claim it as your own or post it through any group.

You may link back to my blog.

Any resemblance to any other tutorial is strictly coincidental.

It is written assuming you have a basic knowledge of PSP and its tools.

It is written using PSP 9 but should work in any other version.

For this tutorial you you will need
This kit by
Creative Scraps by Crys
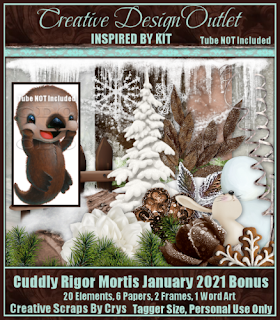
Check out her blog
HERE
Choose a tube 
if desired.
I only used the kit.
Choose your favorite font
I used 
Christmas,
(I thought it was a free font but I can't find it.
Or I would share a link.)
 

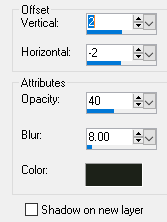
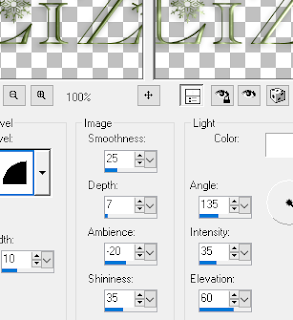
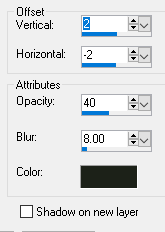
Repeat the same drop shadow
I resized mine X 70% twice.
Paste your tube or the Element #2,
as a new layer.
Position it sitting on the bubble.
Add the same drop shadow.
Paste element #11 as a new layer and drag it to the bottom.
Position it at the bottom center of your canvas. I mirrored it.
Add your drop shadow.
Paste element #3 (The fence)
Resize it by 70% position it as desired.
add the same shadow.
Paste element #1 (The tree) as a new layer,
Drag it to the bottom of the layer pallete.
Add the same shadow twice.
Duplicate it and resize
 by 85% and position.
Duplicate and resize several times so that you have
trees across your tag.
Paste Sparkles 1 as a new layer. 

Drag it to bottom of your layer palette.
Position it top center of your tag and add a shadow of choice.
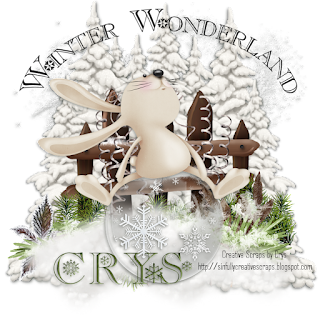
Add my word art if desired or type a quote of your own
.


Add the designers info.
I have made it easy for you.
I made a png if you would like to use it.
I used Agency FB text size 12.
you don't have to use it but it's here if you want it


Now add more elements from the kit if desired.
Don't forget to resize, sharpen and
add a drop shadow, to each element.
Now add your name
and your favorite text effects.
I did an inner bevel with these settings


And then the same drop shadow


And now you are done.
Save as a png.
Thanks for trying my tutorial!
I would love to see your results!
Hugs from Kel


CRM Winter Wonderland


This tutorial was written on 12-7-21, By Kelli.
Please don't copy it or claim it as your own or post it through any
group. 
You may link back to my blog.
Any resemblance to any other tutorial is strictly coincidental.
It is written assuming you have a basic knowledge
of PSP and its tools.
It is written using PSP 9 but should work in any other version.

For this tutorial you you will need 
a tube of choice,
I used a bonus tube from

Cuddly Rigor Mortis
You can find these tubes here
I used the matching kit 
Here
Choose your favorite font
The font I used is 
2Peas Well Behaved
 this is not  a free font.
You will need a mask of choice.
The one I used was created
 by Kathyfrances.
You can  find it here, at the Escape from Reality blog
I used Mask #25

Ready?
Open a new image, 700X 700.
Paste Sparkles (4) as a new image,
Add a drop shadow, here are my settings

Resize the element X 70%
Then add the same drop shadow,
but change the H&V to -2 ,and 2.
Resize it again and add the same drop shadow.
Or one of choice.

Add your tube, resize it as needed to fit inside the bubble.
I resized mine X 70% twice.
Sharpen the tube
Then ad the same drop shadow.
Move the tube so it fits inside the bubble.
Then merge down.
Move to center bottom of canvas,
Make sure not to cut off any of the shadow.

Paste Element #2 (The bunny)
Resize it by 70% and add the drop shadow.
Make him sit on the bubble.
Add element #5, The snow balls.
Drag it below the bunny.
Resize it by 70% Twice. Add the same drop shadow.
Position it as desired and merge visible.
Now add your elements of choice.
I used these:
Leaves 2 - Resize by 85% Drag it to the bottom, 
Position at the bottom of the bubble.
Leaves 1 - Resize by 85% twice.
Add your drop shadow. Position it on top of leaves 2.
And to one side. Duplicate, Resize it by 85%. Mirror it Position it and add the shadow again. if desired.
Add Leaves (3). Resize it by 70% twice.
Position it to the bottom right side.
Add the shadow,
Repeat with Leaves (4)
Rotate by 40%. Position it to the left side.
Add a new layer, Select all.
Paste a paper of choice into selection.
I used paper # 6.
Select  none. Add your mask
and merge group.
Resize it by 90%.

Add a new layer and drag it to the bottom.
Fill it with White.
Add a drop shadow to the mask layer.
Add appropriate Copy wright.

Add your name and position it.
Add this inner bevel :

Now add the same drop shadow as before.
Thanks for trying my tutorial! 
I would love to see your results!


Friday, December 3, 2021

Jolly Winter


This tutorial was written on 12-3-21, By Kelli.
Please don't copy it or claim it as your own or post it through any group.
You may link back to my blog.
Any resemblance to any other tutorial is strictly coincidental.
It is written assuming you have a basic knowledge of PSP and its tools.
It is written using PSP 9 but should work in any other version.

For this tutorial you you will need
These tubes by Keith Garvey.
Tube #'s  210-1 and 350-1
You can get them here
You will need the scrap kit by
Tiny Turtle Designs
Called Jolly Winter

Choose your favorite font. The font I used is 
Winter White size 48
You will need a mask of choice.
The one I used I am not able to share.
But there are some wonderful masks,
that were created by Kathyfrances.
You can find them here, at the Escape from Reality blog


Ready?

Open a new image ~ 600 X 600 transparent.
Copy and paste element #87 (the Santa chair)
as a new layer. Resize it by 75%.
Position it slightly to the right side of your canvas.
Add a drop shadow of choice. This is the one I used.

I repeated this shadow once.
Paste your Santa tube and resize it by 85%.
Add the same drop shadow once.
Open element #110( the Christmas tree).
Drag it behind the chair and resize it by 90%.
Position it behind Santa and a little to the side of him.
Open element # 63 (the Fireplace). Paste it behind the tree and resize it by 85%.
Add the same drop shadow and position it.
Open some of the gifts, I used #105, 77, and 104.
Resize them to an appropriate size, and position them as you like.
Dont forget to use the drop shadow on each element.
Paste the Centerpiece (element #81) as a new layer above the fireplace.
Resize it by 45%. Add the same drop shadow.
Position it on the mantle to one side, Duplicate it and mirror it.
Position to the other side of the mantle.
Open element # 34
Paste it as a new layer behind the centerpiece.
Resize it by 25% Add the drop shadow.
Position on the mantle as desired.
Open Element #22 as a new layer
and resize it by 24%. add the drop shadow.
And position it as desired.
Open element # 22, resize it b 25%
Add the same drop shadow and position. 
Open the second tube,
The New years tube.
Paste as a new layer behind the Santa chair.
Resize it by 55%
Add the same drop shadow and position it as desired.
Add a new layer and drag it to the bottom.
Select all and paste a paper of choice into the selection.
I used paper # 5. Select none.
Go Layers, new mask layer, from image and select your chosen mask.
Merge group. Duplicate the group layer.
Merge these two layers together.
Open element # 80 just above the mask layer.
Resize it by 40%
Sharpen and add drop shadow.
Duplicate it x 2. Position the three layers in a line.
Add your copy wright and scrap kit info.
Grab your text tool
Here are my settings:


Type your name.
Add an inner bevel.
Here are my settings
Now use the same drip shadow as before.
And position your name as desired.
Save as a PNG
Thanks for trying my tutorial!