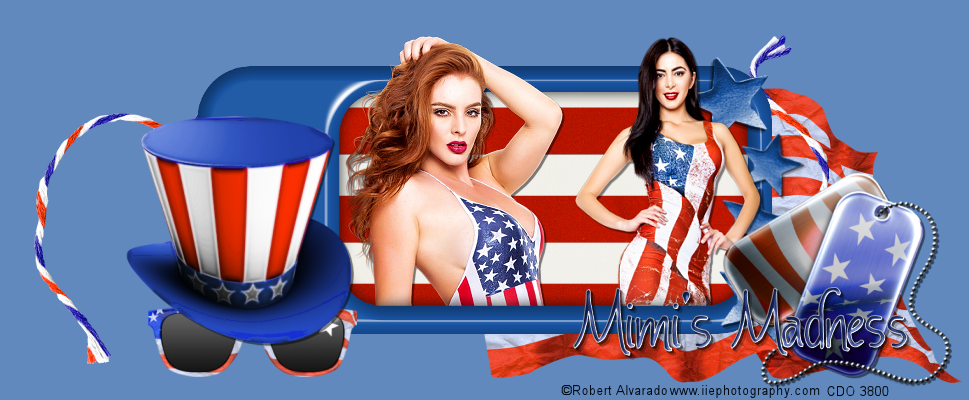
Showing posts with label Millie's. Show all posts

Tuesday, April 27, 2021

Hot Stuff


This tutorial was written on 04-27-21 By Kelli.
Please don't copy it or claim it as your own or post it through any group.
You may link back to my blog.
Any resemblance to any other tutorial is strictly coincidental.
It is written assuming you have a basic knowledge of psp and its tools.
It is written using 9 but should work in any other version. 
You will need a tube of choice,
I used The bonus tube RobertAlvarado-June-2016
you can get it at CDO  
And you Will need the scrap kit by Persia
called USA
I don't know where you can buy her kits.
If you know please let me know so I can provide a link.
You will need the template by Millie Template 759 
And a font of choice.
I am using  Independence

Ok, ready?
Open the template.
Shift + D to duplicate and then close the original.
Delete the Copy wright layer.
Starting at the bottom of the layer pallette
Layer 1- Paper 26
Delete layer 2
Layers 3,4 and 5 I used paper #7
Layer 7 I just added a drop shadow too.
Layer 7 I just changed the color to black.
You could also add some special effects or textures or noise to the layers.
I also added this drop shadow to the layers 3,4 and 5


Add one of the flags just above the background layer, resize and position.
 Add the same drop shadow if desired.
Add the scatters above the flag. I had to resize them by 60% twice. 
Sharpen and add a shadow of choice to each.
Add your favorite elements from the kit now, I used the hair band and resized it by 40% twice
and then by 80%, and placed it in the upper right corner above layer 6.
Add one of the scatters above the word art layer,
resized and rotated by 90%
Sharpen and add a drop shadow.
Paste Sparkle #6 above the background layer,
I resized by 50%.
Delete the white background layer.
Add the ©, scrap kit info and your taggers info.
Add your name and the desired effects.
Save as a png.
And now your done!
Thanks for trying my tutorial!
I hope you are happy with your results!
I would love to see them!


Tuesday, April 13, 2021

Under the Sea


This tutorial was written on 04-13-21 By Kelli.
Please don't copy it or claim it as your own or post it through any group.
You may link back to my blog.
Any resemblance to any other tutorial is strictly coincidental.
It is written assuming you have a basic knowledge of psp and its tools.
It is written using psp 9 but should work in any other version.
  You will need the scrap kit :Sea Breeze, By Kizzed By Kelz.
A tube of Choice,
I'm using Mermaid Girl by Alex Prihodko
You can purchase it at Pics for Design
You will also need the template by Millie
And the Frames Dingbat
Which you can find Here
You will also need a font of choice.
I'm using: WASH YOUR HANDS
 
Ok Ready?
Open the template, shift +D to duplicate and close the original.
Resize by 85% all layers checked, Then canvas size to 650 by 650.
Activate the bottom layer, hit delete on your keyboard to delete the white layer, 
click the eye to be able to see the layer. 
Select all and paste a paper of choice into selection. I used the background from the tube.
Merge down layers 1,2 and 3.
Select all, float and de-float.
selections invert, paste a paper of choice as new layer, hit delete on your keyboard.
Select none.
Repeat with layers 4, 5,6 and 7. using papers of choice.
Add a drop shadow of choice to each template layer.
Delete the info and the text layers, of the template.
Activate the bottom layer, now grab your text tool and find your dingbat.
Type a capital H. Stroke set to black, line width 3. Foreground null. Size 350.Create as vector. 
Now go objects, align center in canvas. Convert to raster. Grab your magic wand and click inside the frame you just made. 
Selections expand by 2. Make the bottom layer active and right click your mouse, 
promote selection to layer. drag promoted selection to top just below frame layer. deselect.
Apply an inner bevel or glass effect, activate frame layer and add a drop shadow. 
now merge the 2 layers.
Drag merged layer to just above the bottom layer. grab your magic wand and click outside the frame. 
activate the bottom layer and hit delete on your keyboard.
Add element # 9 as a new layer, place in center bottom of canvas.
Paste tube as a new layer and resize by 70% three times.
Paste #80 as  new layer and send to bottom.
Paste element #3 as new layer and send to top. position as desired.
Sharpen more and add a shadow of choice.
Now add your favorite elements from the kit.
Add a shadow to each layer if desired.
sure to add ©, and scrap kit info.
along with your taggers info.
Now add your name, along with your favorite text effects.
I only added an inner bevel and a drop shadow.
Save as a png.
And now your done!
Thanks for trying my tutorial!
I hope you are happy with your results!
I would love to see them!


Country Life


 This tutorial was written on 04-13-21, By Kelli.

Please don't copy it or claim it as your own or post it through any group.

You may link back to my blog.

Any resemblance to any other tutorial is strictly coincidental.

It is written assuming you have a basic knowledge of psp and its tools.

It is written using psp 9 but should work in any other version.

I am using a tube by Jessica Dougherty 

And the inspired by kit by Gimptastic Scraps  

You can purchase these at Creative Design Outlet

You will have to have a license to use this tube.

I am also using template #574 made by Millie 


Ok Ready?

Open frame The template.

Shift +D to duplicate, close the original.

Delete the copy wright layer.

I always start on the bottom layer of the template.

Merge layers 1 and 2, select all selections float, selections de-float. Selections invert.

Paste paper # 4 as a new layer and hit delete on your keyboard. Now delete the merged template layer.

On layer #3 Select all, selections float, selections de-float and then invert selection. 

Paste paper #6 as a new layer and hit delete on your keyboard. Delete layer #3. 

Merge layers 4 and 5.Select all, selections float, selections de-float. 

Add a new raster layer and paste paper #3 into selection. select none and delete the  merged template layer.

On layer #6 select all, selections float, selections de-float. Add a new Raster layer. 

Paste paper #5 into selection, selection none. Go adjust, blur and apply gaussian blur set at 6.00. Delete the template layer.

Layer 7, selections, select all, float, de-float. add new raster layer, paste paper #2 into selection. 

select none, delete template layer.

Delete layers 8 and 9, unless you aren't going to use different word art.

Paste tube as new layer. resize by 80%. Position, sharpen and add a drop shadow of choice.

Add your word art and add the same drop shadow if desired.

Now its time to begin adding elements from the kit.

# 20 ( Tree) resized by 80%. Position as desired, I placed mine on the left side of the tag.

# 6 (fence)  Not resized.

# 22  (grass) Resized by 80% three times. Duplicate several times and place along the fence.

# 6 (Sunflower) Resize by 60% twice and placed along the fence behind element # 22.

# 4 (Flower) Resized by 40 % twice, Duplicate several times and place along the fence row.

# 1 ( Hen) Resize by 40 and sharpen. Add a drop shadow and place her sitting on the fence.

# 5 (Truck)Resize by 60% position as desired.

# 19 (Basket of apples) Resize by 60% twice.

# 23 (Basket) Resize by 60% and then 80%

# 24  (Hay) Resize by 60. Paste this element just above the fence. 

Duplicate it several times and position it along the bottom of the tag.

I liked the way it looked on the white so I added a background layer of white.

Now its time to add your copywright.

And add your name in a font of your choice. I used Blacksword

When you are happy with it, save it.                 

Thanks for trying my tutorial!

I hope you are happy with your results!

I would love to see them!